Viewing entries in
"dessert"

Comment

Cooking with BS's 2-Year-Anniversary Post!


It's already been 2 years since Katy and I started Cooking with B.S.! Since there's no way we could top last year's anniversary post of Skip's Scramble, so I thought it would be a good idea to host a dinner party and invite a few of our friends over.


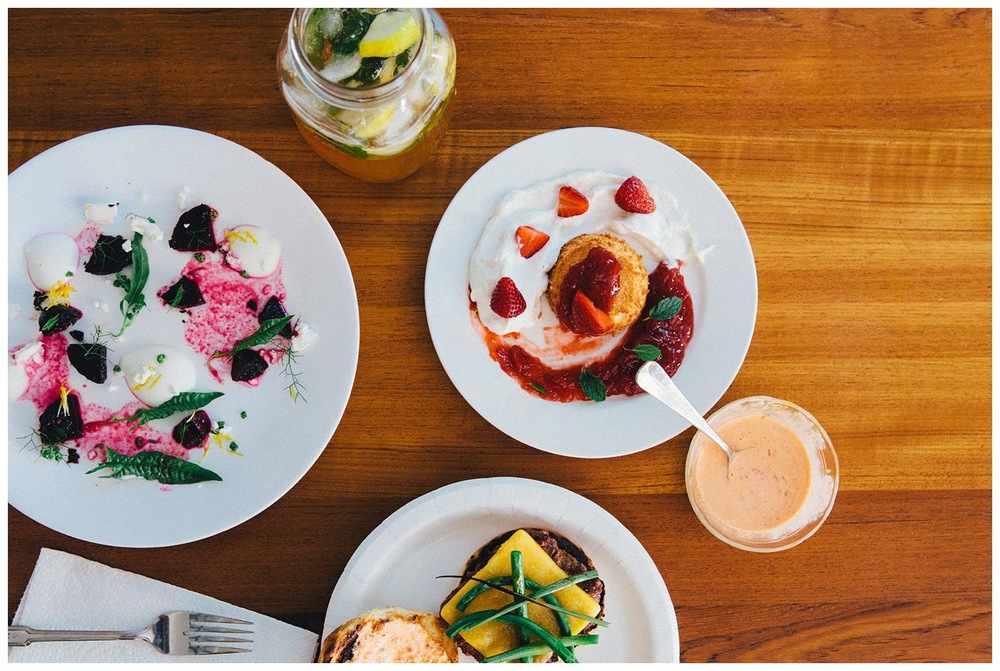
For this late-spring dinner I wanted to represent the beginning of summer and meals to come in the summer months. I made Arnold Palmers with mint and bourbon, a fancy beet salad, grilled burgers and angel food cake with fresh strawberries and whipped cream. 


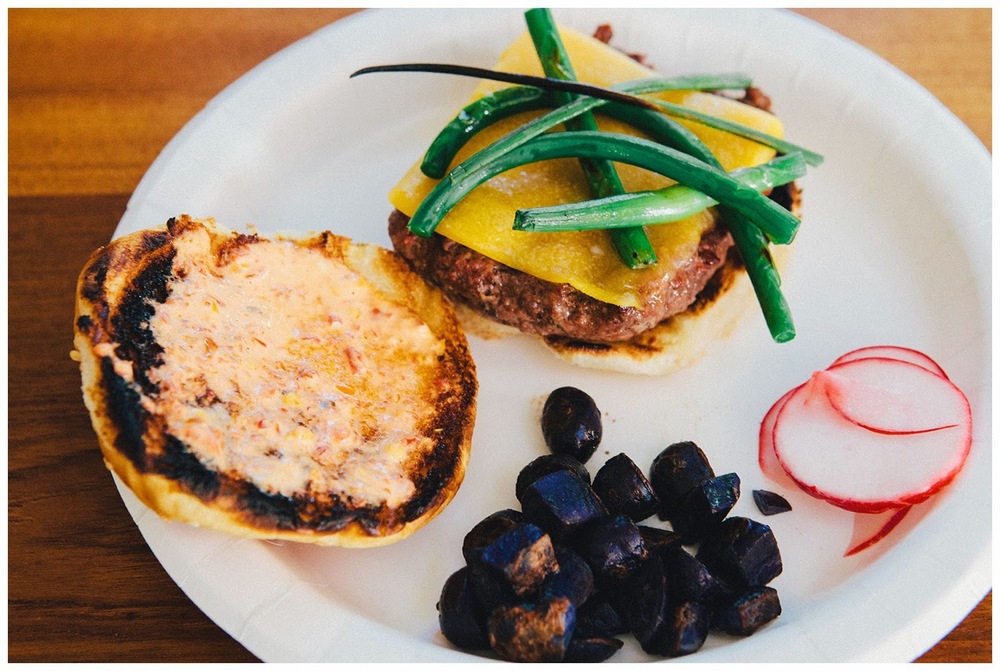
No those aren't black olives. They're purple potatoes from my garden! Lightly sauteed. 

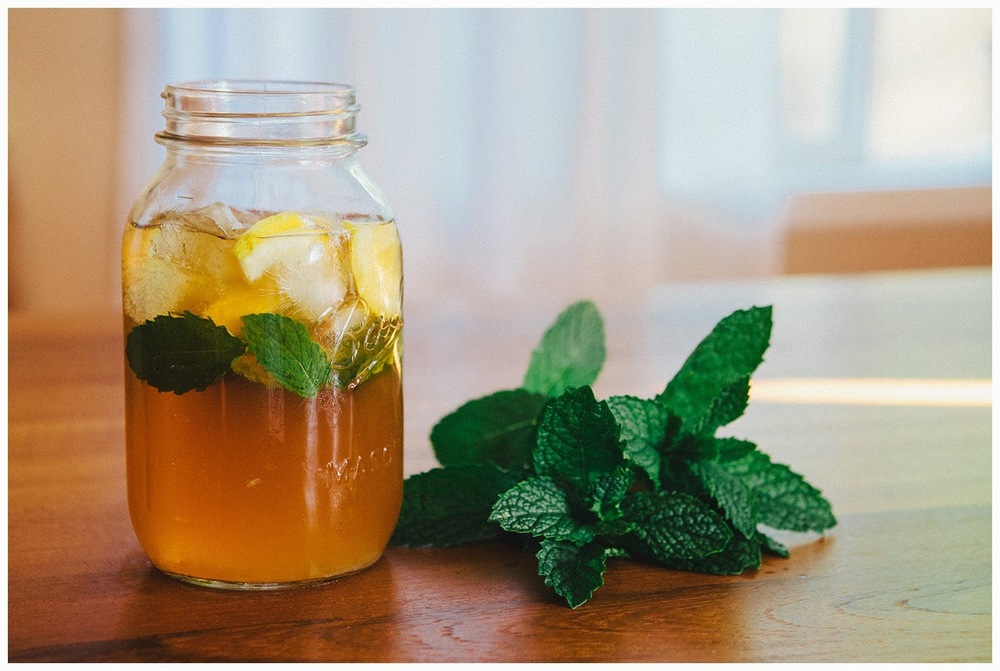
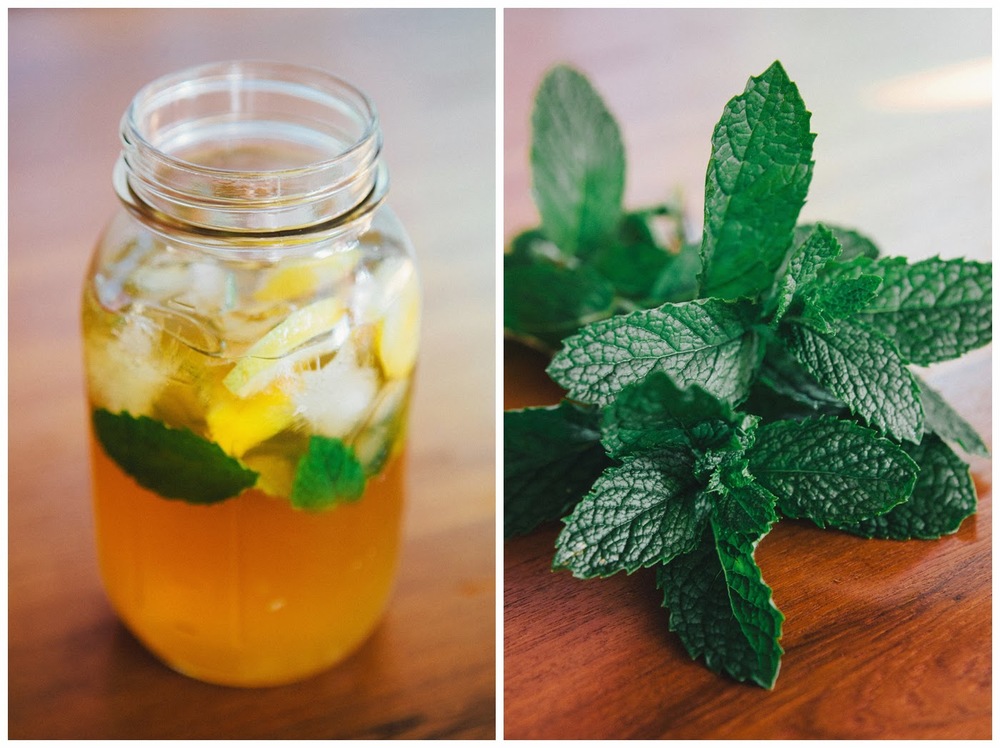
Bourbon Mint Arnold Palmers

There is something so simply delicious about lemonade and iced tea. Like most things it's more delicious if you add bourbon and mint to it. For these Arnold Palmers I steeped two tea bags in a large mason jar. I used one green tea bag and one black tea. Then I added the lemonade I made earlier in the day.
I then added mint leaves to another mason jar (what up Pinterest?) added ice and then muddled the leaves a bit. Added the bourbon, iced tea and then lemonaid. Then served to some thirsty guests.

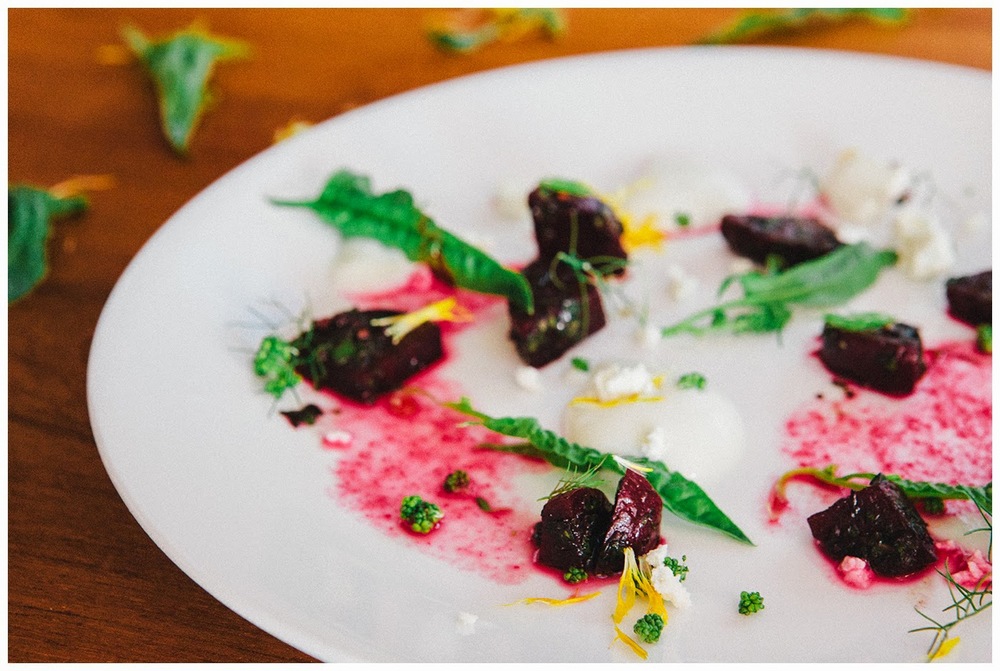
Brian's Fancy-Ass Beet Salad

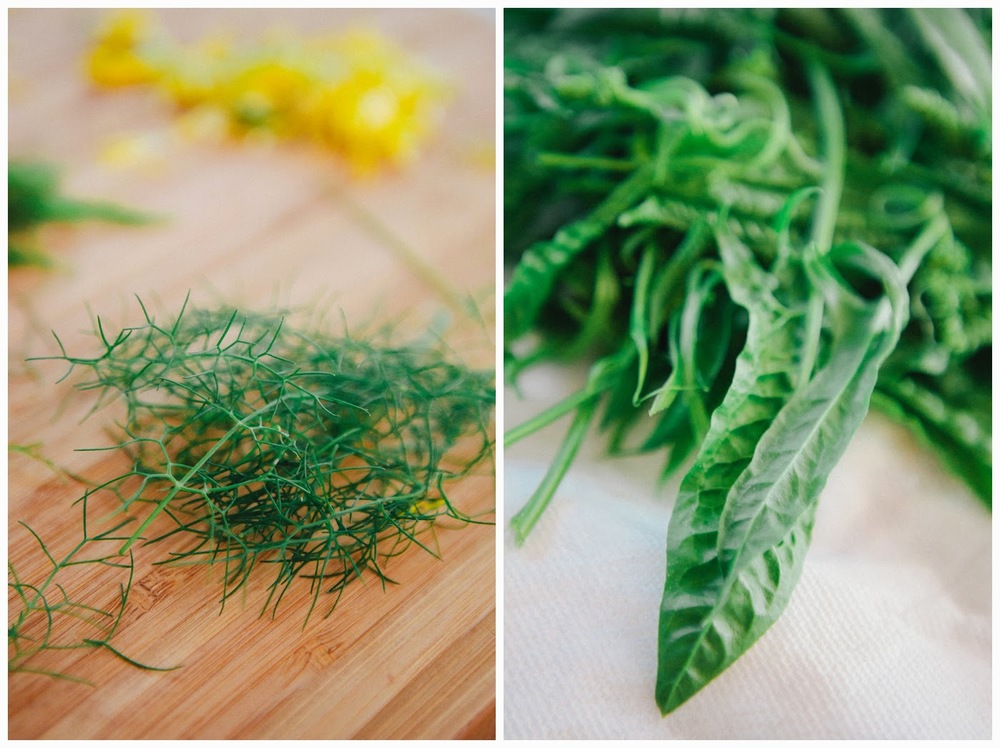
This dish is the crown jewel of this cooking blog in my opinion. It features boiled beets with a herb puree coating, whipped yogurt, chevre, beet foam, dill sprigs, spinach leaves, dandelion petals, and did I mention that all the greens were from my garden? It was light and airy and turned a beet salad into something made for summer.


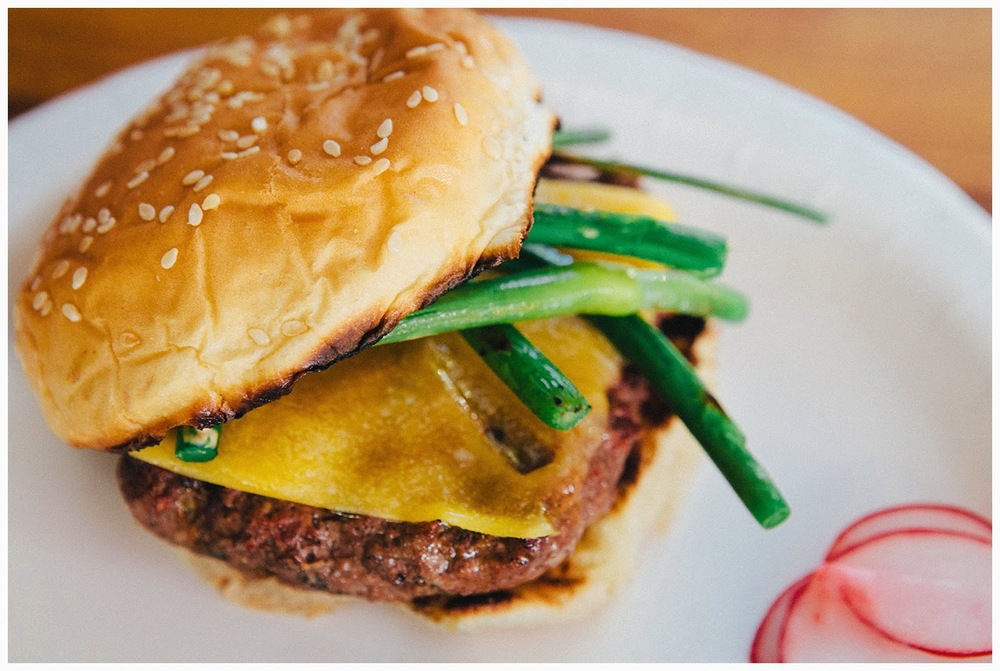
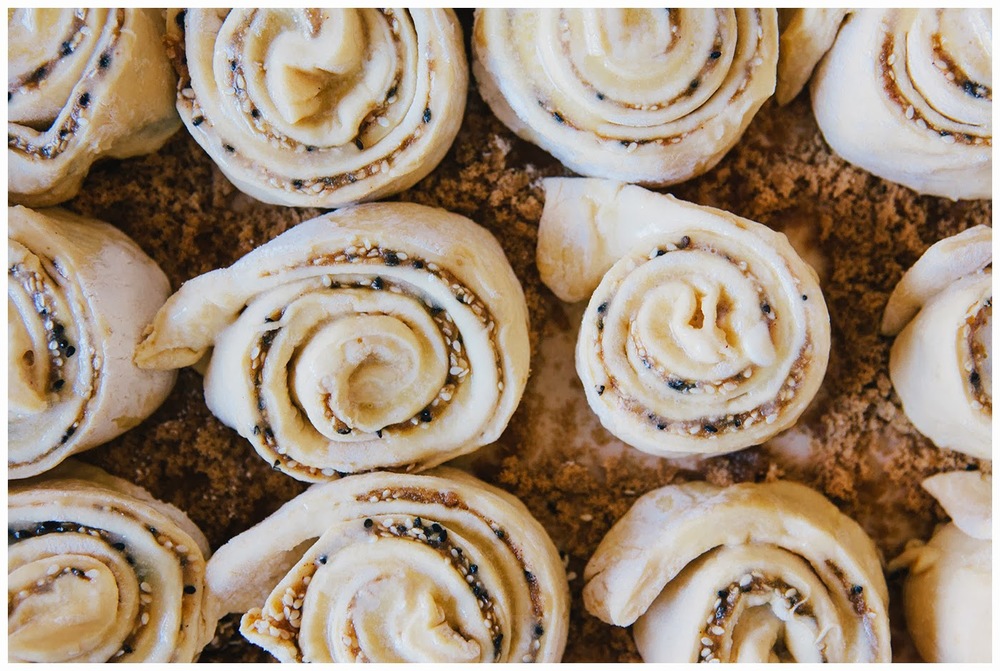
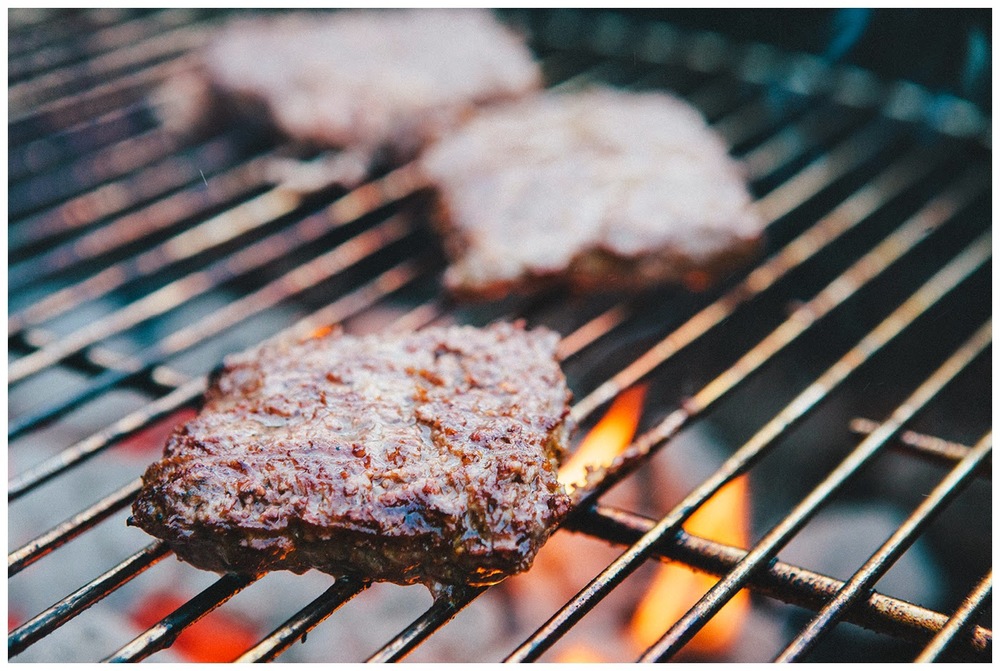
Garlic Chutes and Cheddars Burger comes with garlic shoots

Obviously this is an ode to Bob's Burgers, writers feel free to use this one next season. This burger was made with spices in the middle, cheddar cheese, grilled garlic shoots, and sriracha mayo all served on a sesame seed bun. I'm not gonna give you any of my burger secrets! Go bug Alton Brown.

Angel Food Cake with Fresh Strawberries and Whipped Cream

Honestly the Joy of Cooking has an amazing Angel Food Cake recipe go look it up! Now! Super simple dessert I just plated it sort of fancy-like.


So there you have a Cooking with B.S. Dinner party! I can't believe it's been two years already! All photos taken by Katy Weaver. Oh by the way, this is our last blog post until fall.


Comment

1 Comment

Corn Flake Macaroons

Corn Flake Macaroons

As vintage month comes to end I thought I would adapt an old recipe I found in a Searchlight Recipe Book printed in 1944, sidenote: this book also contains several recipes for squirrel (perfect for wedding receptions). Corn flake macaroons just sounded olde tyme to me. Sure adding cereal to a dessert is pretty normal just ask Snap, Crackle or Pop. But corn flakes? They're one of the oldest types of cold cereal. Honestly I think they should be added to more recipes. It adds just enough of a crunch. 

Corn Flake Macaroons remind me a lot of rice crispy treats. They're both crispy and sweet, but these macaroons have a bit more depth to them, thanks to the coconut and chocolate. So if you're ready to step up your dessert game and impress everyone at the next family event. Let the kids make the rice crispy treats and make an adult dessert instead. 

Corn Flake Macaroons
corn flakes
almonds!
macaroons

Corn Flake Macaroons

  • 2 Egg Whites
  • 1 cup Sugar
  • 1/4 teaspoon Salt
  • 1/2 teaspoon Vanilla Extract
  • 1 cup Coconut shredded 
  • 2 cups Corn Flakes
  • 1/2 cup Almonds sliced 
  • 1/2 cup Semi-Sweet Chocolate Chips
  • 3 tablespoons Water
  1. Preheat the oven to 375°
  2. Beat the egg whites with an electric mixer until stiff peaks form. 
  3. Gradually beat the sugar and salt into the egg whites. 
  4. Fold in the vanilla extract, coconut, corn flakes, and almonds.
  5. Scoop with a teaspoon onto a baking sheet lined with parchment paper.
  6. Bake until the sides and the tops of the cookies are golden brown. 
  7. Boil 3 cups of water in a sauce pan. Place the chocolate chips and 3 tablespoons of water in a heatproof metal bowl over the saucepan. Continue stirring the chips until melted. Drizzle the chocolate over the cookies. 
  8. Try to eat all of them in one sitting
All photos by Katy Weaver!

corn flake macaroons

1 Comment

2 Comments

Espresso Hazelnut Crème Brûlée

Espresso Hazelnut Crème Brûlée

I don't mean to brag, but this is the best Crème Brûlée ever, so suck it France! Crème Brûlée is one of the most elegant desserts you can make. Maybe it's the simplicity of its ingredients or the crunch of the burnt sugar that gives way to the creaminess inside. Or it could be that infusing flavors into this classic dessert is like painting on a blank canvas. That, or it might just be that the French know their way around desserts, but that seems unlikely.

eggs and cream
hazelnuts

Quick shoutout to Oregon hazelnuts!! What what!! That is all. Carry on.

Blended Hazelnuts

Espresso Hazelnut Crème Brûlée

Yields four 5oz. servings
  • 2 cups Heavy Cream
  • 6 Egg Yolks
  • 1/3 cup Granulated Sugar 
    • Plus extra for the topping
  • 1/8 teaspoon Salt
  • 1 tablespoon Instant Espresso 
  • 1 teaspoon Vanilla Extract
  • 1/3 cup Hazelnuts coarsely blended
  1. Preheat the oven to 300° and move the baking rack to the second lowest. 
  2. Boil about 7 cups of water. 
  3. Heat 1 cup of the cream, sugar, salt, and instant espresso in a medium saucepan over medium high heat. Stir constantly to avoid burning. You don't want to burn the cream, that comes later.
  4. In a mixing bowl whisk the egg yolks with the vanilla extract until the texture becomes consistent.  
  5. Pour the cream mixture into the yolks. Be sure to do this slowly and temper the egg yolks to avoid coagulating the proteins in the yolks. 
  6. Line a deep baking dish with a dish towel. Place the empty ramekins in the dish, make sure they're not touching.  
  7. Strain the mixture with a fine mesh strainer and pour into the ramekins. Place into the oven. Pour the boiling water into the large dish. Try to avoid getting water into the desserts. Bake for 25-30 minutes.
  8. Remove from oven and let cool. Place in fridge for at least 2 hours to set.
  9. Once you're ready to serve, evenly pour about a tablespoon of sugar on each one. Using a torch, burn the sugar just until it's bubbly. Sprinkle the hazelnuts onto the bubbling sugar. Enjoy with a spoon!  
Espresso Hazelnut Crème Brûlée
before burning

Espresso Hazelnut Crème Brûlée
getting burnt

Yes, Katy Weaver took all these wonderful photos!

Espresso Hazelnut Crème Brûlée
finished product!

2 Comments

Comment

Sesame Seed Sticky Buns

Sesame Seed Sticky Buns
baking ingredients

We're taking a lil break! I'm starting up a few new projects including a Podcast! And Katy is going to be in SE Asia for a month, so we're taking a lil break and will be back in March with some more amazing recipes!! So this post is going to have to hold you over for a while.

Sesame Seed Sticky Buns
eggs and sesame seeds
sticky buns
sticky buns

Sesame Seed Sticky Buns


  • 2 packages of Active Dry Yeast
  • 1/2 cup Water
  • 1 teaspoon Sugar
  • 1 1/4 cup Buttermilk
  • 2 Eggs
  • 5 1/2 cups Flour
  • 1/4 cup Butter softened
  • 1/4 cup Sugar
  • 2 teaspoons Baking Powder
  • 2 teaspoons Salt
Fillin'

  • 1/4 cup Sesame Seeds 
  • 1/2 cup Butter melted
  • 1/2 cup Brown Sugar
  • 1 teaspoon Cinnamon ground
  1. In a large mixing bowl add the yeast, warm water, and 1 teaspoon of sugar. Place in a warmish environment for about 10 minutes. I recommend using the microwave, but don't turn it on! It'll kill all those farting bacteria and you'll end up with sticky flats instead of sticky buns!
  2. Combine the yeast mixture with the buttermilk, eggs, 2 1/2 cups of flour, butter, sugar, baking powder, and salt. Once all the ingredients are well incorporated start adding the rest of the flour, 1/2 cup at a time until the dough becomes tacky. 
  3. Knead the dough out on a clean(ish) surface that's lightly covered in flour until the dough becomes smooth and elastic. 
  4. Oh did you preheat your oven to 375°? Cause you should probably do that now.
  5. Divide the dough into 2 separate balls. Roll out each ball into a 12x7 inch rectangle.
  6. In a small mixing bowl mix together all the fillin' ingredients.
  7.  Spread the fillin' evenly across one of the dough sheets. Place the other sheet across the other. Crimp the edges and cut it into 12 strips.
  8. Coat a casserole pan with butter. Add a handful of brown sugar to the bottom of the pan and evenly spread it. 
  9. Roll up each dough strip into, well rolls. Evenly space them in the pan. Cover and let them double in size. Go watch an episode of Arrested Development or something.
  10. Oh man! That GOB! Okay now you can start baking the buns. About 30 minutes should do it. 
  11. Once the buns have finished baking IMMEDIATELY dump them out of the pan upside down onto a baking sheet with parchment paper on it. Let them cool a bit and start stuffing them in your face!

Sesame Seed Sticky Buns

These pictures that will stick with you are taken by Katy Weaver!

Sesame Seed Sticky Buns

Comment

2 Comments

Yam and Marshmallow Whoopie Pies

Yam and Marshmallow Whoopie Pies

Thanksgiving is already upon us. If you follow this blog then you know we've been making Thanksgiving inspired recipes all month and there's no better way to end November than with something sweet. Yams with marshmallows are usually pretty delicious, but the yams turn out too soggy half the time. Instead of making those soggy tubers, make the stickiest damn cookies EVER. If you have kids I highly recommend giving them these cookies. They'll be so sticky that you can just kind of stick them to a wall and not have to worry about them for a while. Or they'll just make everything in your house sticky. Do whatever you want, they're not my kids.

Yam and Marshmallow Whoopie Pies

Despite being so sticky that NASA uses the filling to patch holes in the space station, these cookies are pretty damn good to be honest. They're a nice break from the traditional pumpkin and pecan pie and they still feel extremely seasonal too. So now is the time to bust out this new recipe and finally show grandma who's really in charge of the kitchen.

baking ingredients
yams
yams
marshmallows
yam cookies

Yam and Marshmallow Whoopie Pies

  • 1 1/2 cup Flour
  • 3/4 teaspoon Baking Powder
  • 1/2 cup pureed and cooked Yams
  • 1 cup Sugar
  • 1/2 teaspoon Nutmeg
  • 1/2 teaspoon Cinnamon
  • 3 Eggs
  • 1/4 cup Butter melted
    • 1 tablespoon extra
  • 1/4 cup Shortening 
  • 1 teaspoon Vanilla
  • 3/4 teaspoon Salt
  • 1 package Big Marshmallows
  1. After boiling your cubed yams in water, preheat your oven to 375°. 
  2. Using a mixer mix the sugar, eggs, butter, shortening and vanilla together. Add the yams. Sift in the flour, baking powder, nutmeg, cinnamon and salt. Fold in all ingredients together with a rubber spatula.
  3. Scoop the batter onto a baking tray using soup spoons. Don't worry about making them perfectly circular, the stickiness of the marshmallows will distract any naysayers. 
  4. Bake for 10 minutes or until the edges begin to brown slightly.
  5. Let the cookies cool on a cooling rack while you make the marshmallow filling.
  6. To make the marshmallow filling use a medium sized sauce pan. Melt 1 tablespoon of butter. Add all the marshmallows. Constantly stir until the marshmallows are just slightly melted. 
  7. Spread on the bottom a cookie and then add another to the top. Dip in chocolate if you're feeling ambitious.
yam cookies
Whoopie Pies

Everyone enjoy their Thanksgiving and be sure to make all my Thanksgiving recipes this year! All delicious looking photos by Katy Weaver!

Yam and Marshmallow Whoopie Pies

2 Comments